Last updated 669 month ago

Intel is refining its computing imaginative and prescient and wherein it sees the PC going
Forward-searching: In an generation where it's clear that PCs nonetheless count, Intel is making a assertion about the future of the PC category with the an awful lot-anticipated launch of the Core Ultra chip (codenamed...
Last updated 12 month ago
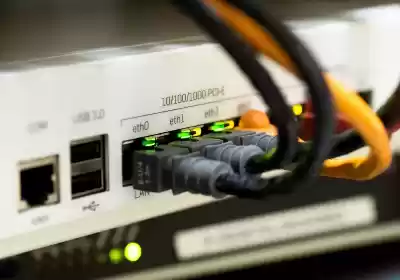
US ISP launches first 50 Gbps provider for residential clients, costs $900 consistent with month
Do you suspect gigabit internet just is not speedy sufficient? How about 10 Gbps speeds, or maybe Google Fiber's 20 Gig? For those who need bragging rights for what's presumably the quickest residential internet within...
Last updated 13 month ago

TSMC claims era supremacy, compares their 3nm node to Intel's 18A
Why it subjects: In the following couple of years, the microchip industry will witness large technological improvements inside the manufacturing procedures for silicon additives. TSMC is looking forward with full self b...
Last updated 14 month ago

China sets attractions on mass-producing advanced humanoid robots with the aid of 2025
China continues to express aims to be a global leader in several tech industries, in spite of the increasing export sanctions introduced by using the USA. The contemporary of those is advanced humanoid robots, which it...
Last updated 13 month ago

Nvidia and Foxconn accomplice to construct "AI factories" for self-riding cars
Earlier this yr, Foxconn and Nvidia introduced a partnership to broaden systems for self sustaining automobiles. Now, these technology giants have disclosed their plans to set up AI-targeted data facilities, in order ...
Last updated 14 month ago

Noblechairs Legend Review: Can It Match the Secretlab Titan Evo?
Pricey gaming chairs won't rank extraordinarily on a PC owner's list of priorities. They're no longer the thrashing coronary heart of the gadget, and they won't push video games to their limits as your GPU does. Surely ...
Last updated 14 month ago